|
One of the most frequent questions I get is about how I do floppy fursuit ears, so I thought I'd share! I'm sure similar tutorials are available, but I wanted to contribute in case it might be helpful. If you found my tutorial useful, please consider leaving a tip at this link to support my work! Before you get too far, I am starting this tutorial assuming that you already know how to hand sew. If you do not know the stitches or concepts I reference, there are relevant links through the tutorial. 1. Planning your ears First things first is planning how you'd like your ears to look. I use a simple paper template and tape for this. The top and bottom pieces of the ear are cut apart to be used later. You can label them "ear top" and "ear bottom" if you want! 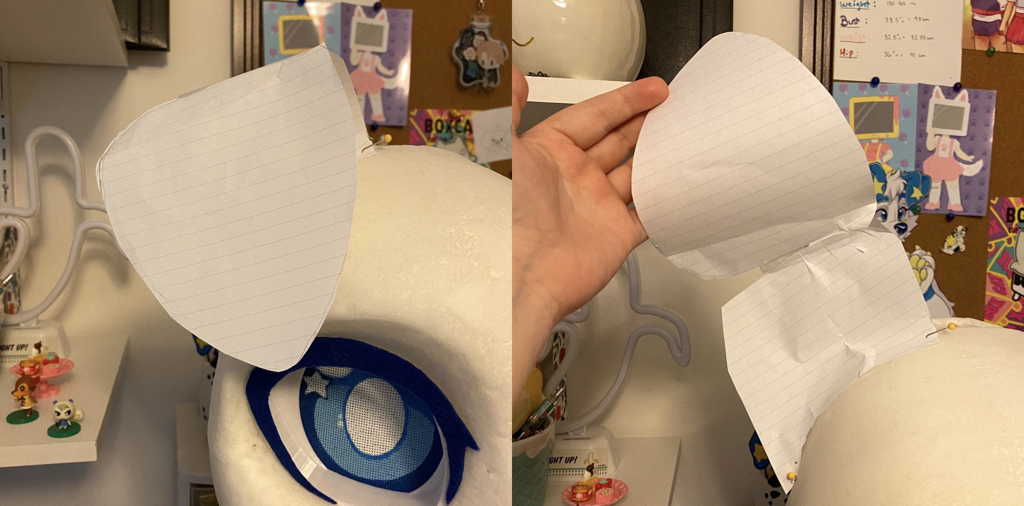 Template-- Just paper and tape! View your fursuit head from different angles to assure that you like the length and placement of the ear. On some heads (like my foam base or other heads that are not foam all around your own head) you may need to extend the top of the head back more so the ear can sit back further. It's up to you! 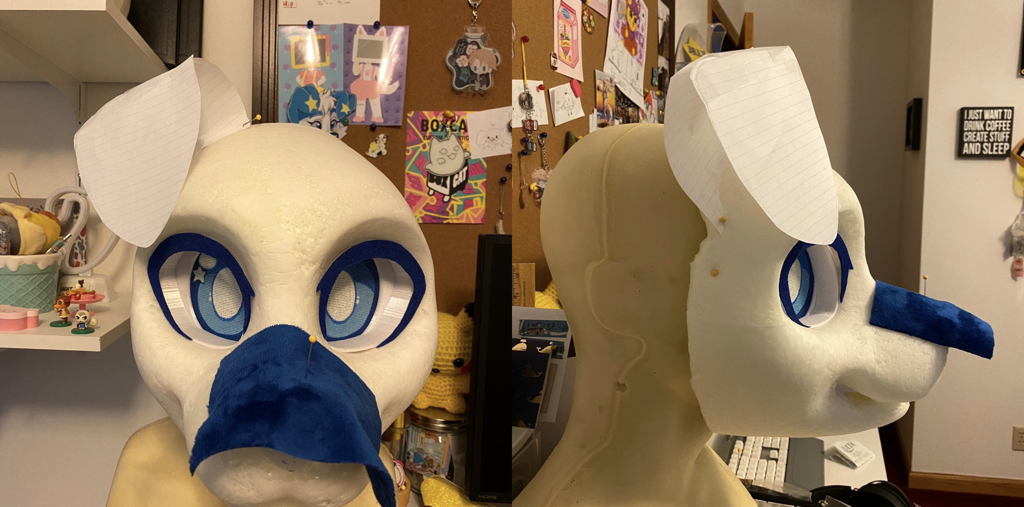 Checking position from multiple angles Once you're happy with the template, un-pin it from your head and separate the top and bottom pieces. The bottom piece will be made of a foam chunk, and the top will be only fabric. 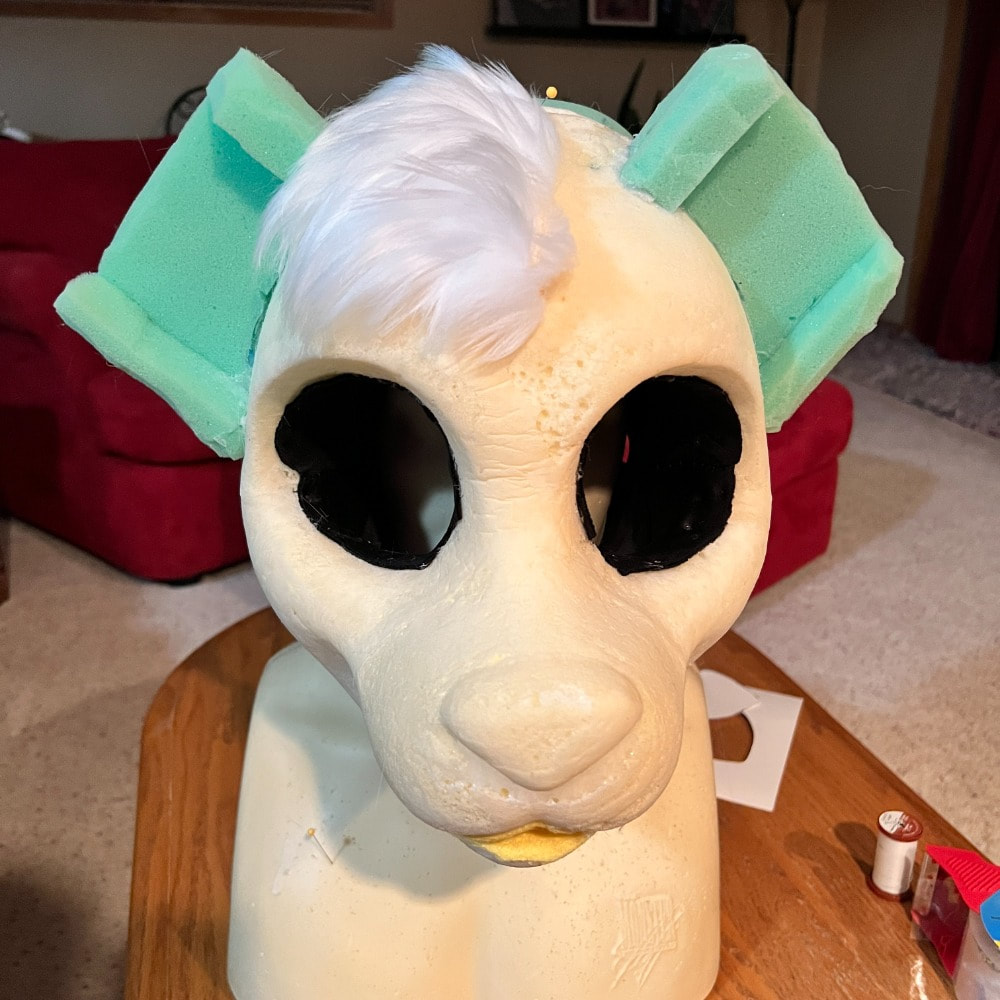 Here's a picture of the "foam chunk" that the base of the ear is made of . I add raised sides for added depth, but that's optional! Here's a picture of the "foam chunk" that the base of the ear is made of . I add raised sides for added depth, but that's optional! 2. Prepare your fur & cut out your pattern pieces • If you used flimsy notebook paper (like me) transfer your whole pattern to a thick cardstock paper. • Once your pattern is on cardstock, draw your character's markings exactly how you want them to look. Cut the markings out and label each pattern piece so it doesn't get lost! Draw arrows so you know which direction the fur should go as well. Next, we'll shave our fur to the length we want. DO NOT EVER SHAVE FUR WITHOUT A MASK OR RESPIRATOR. Fur is made of synthetic materials (plastic), so when you shave it you're filling the air with microscopic plastic shards. Inhaling this is TERRIBLE for your lungs. There's lots of tutorials for fur shaving/tools to use so I won't explain that! (here's a great tutorial) I want somewhat short fur for the ears, so I used an Andis 5FC blade for my fur-- it cuts the fur to be ~6.3mm long. My clippers are the Andis ProPet. 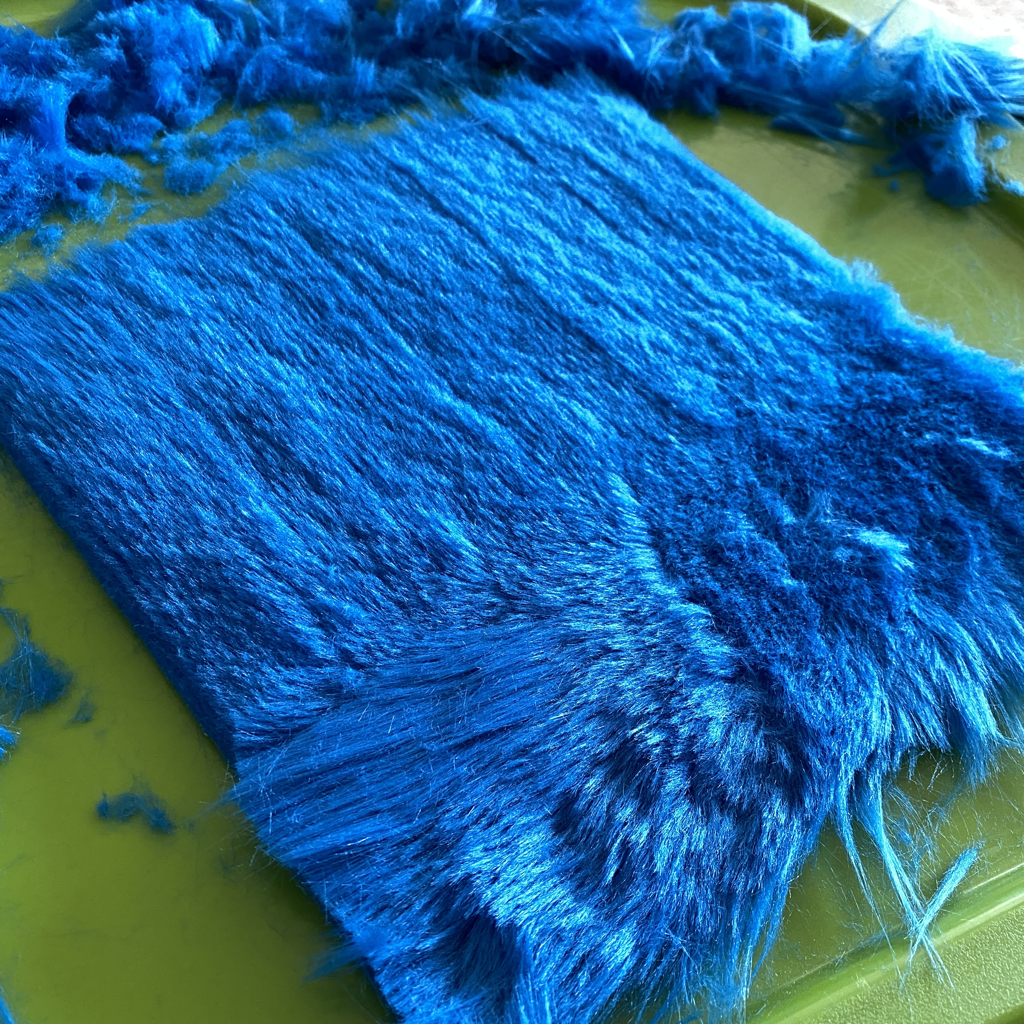 Fur during the shaving process Take your pattern pieces and trace them onto your fur. Make sure your fur is pointing in the correct direction before you cut anything out! The fur on animal ears points toward the tip of the ear. Use a razor or box knife to cut ONLY the backing; you don't want to chop through your fur! Remember to cut out two of every pattern piece; you need one copy for each ear. I will not be adding any seam allowance because I hand sew fursuit head pieces. The foam "base" part of the ear will need a pattern made of it as well. Cover it in tape, draw on your seams, and trace these pieces onto your fur as well. (This is the same method used to pattern fur for fursuit heads. Find a tutorial on this that works for you, or see here for the "tape method" of creating a fabric pattern for 3D items). 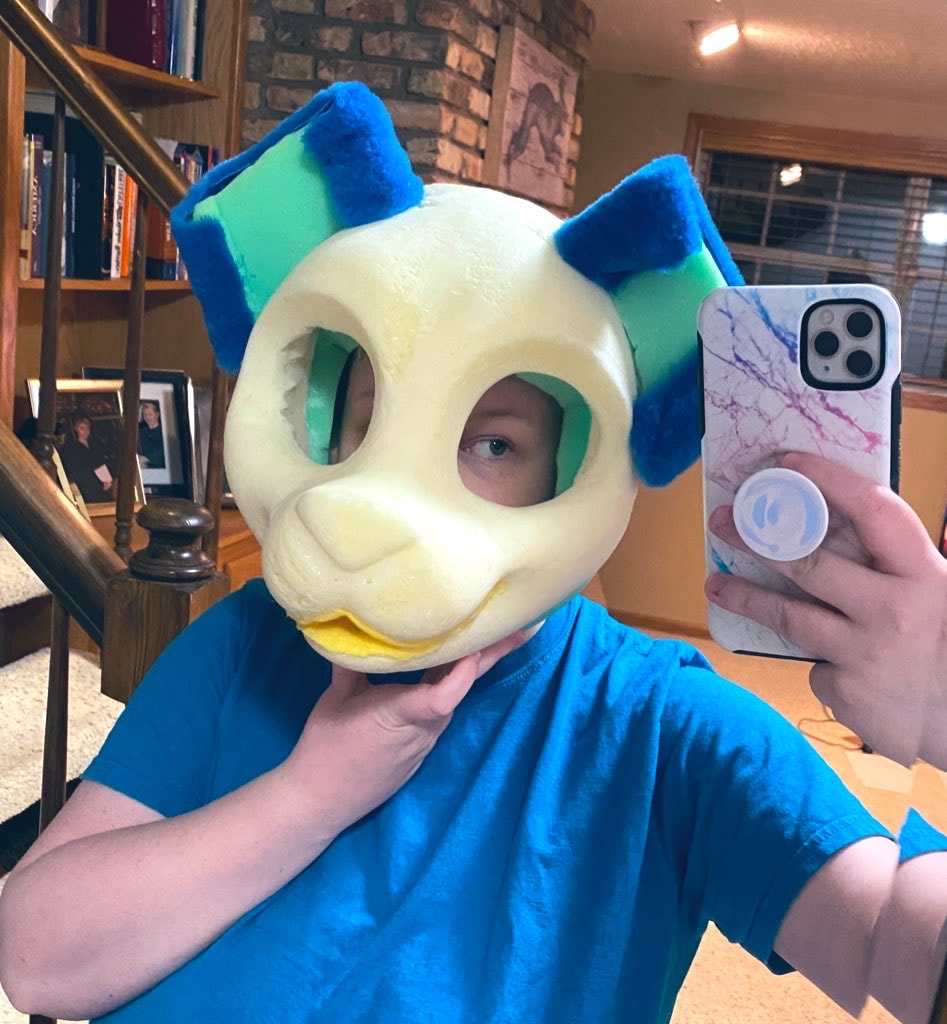 Here is a pic of the foam base for the ears with fur on them-- I made the inside of the ears a different color, so the center is "empty" 3. Sewing the pieces together Now we want to sew all these pieces together! If your ears have any markings, sew the markings on first. Place the fur where it needs to go and pin it into place. I usually hand sew my fursuits, so I'll be taking a straight sewing needle and matching colored thread and sewing the pieces together from the INSIDE of the ear. Sewing from the inside makes the stitches less visible and is easier to create solid stitches. • If you don't know how to hand sew, don't worry! It's easy! I use a blanket stitch, but you can also use a ladder stitch. There are tons of tutorials for simple hand sewing, so pause here to get that information if you need it. I recommend that you go slowly, and if you mess up remove the bad stitch and try again. You'll be glad you did! 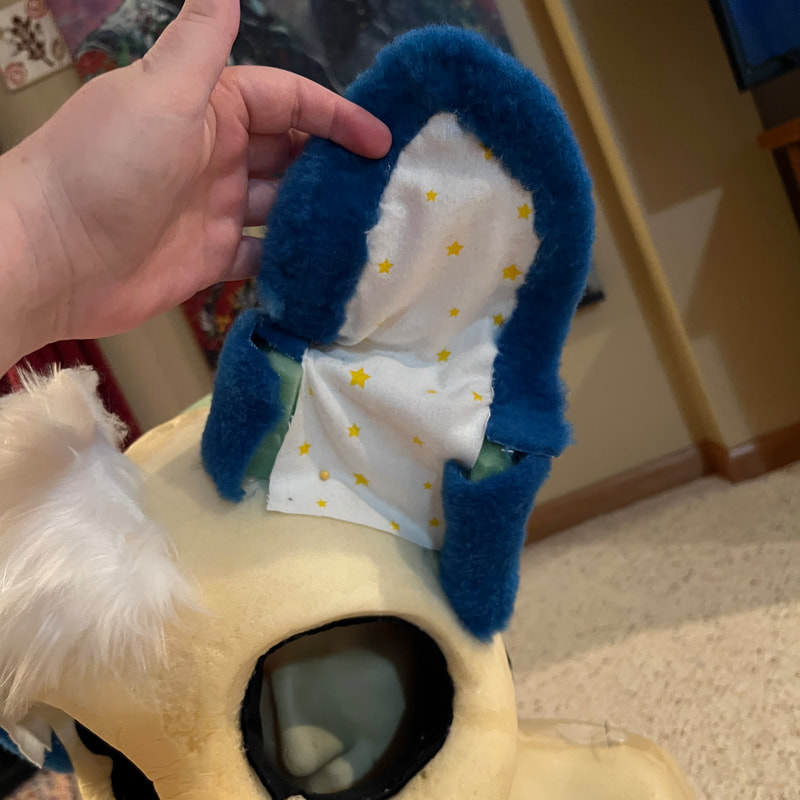 Here are all the pattern pieces pinned together Here's the finished ears! I don't glue my ears on until after I fur the head, so no stray glue will accidentally end up on the ears while I'm working. 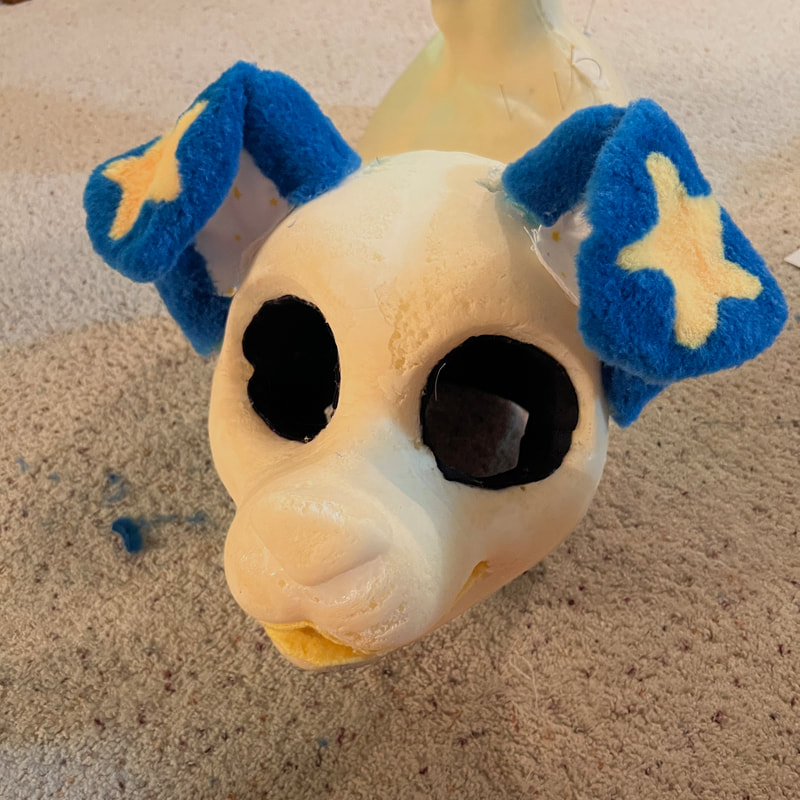
0 Comments
|
ArchivesCategories |
 RSS Feed
